Tilly And The Buttons: Joni dress
The neckline of Joni dress is what drew me to buy the latest Tilly And The Buttons (TATB) book, even if I originally assumed it was a top on the cover photo. Despite being the main draw, it wasn’t the first garment I decided to sew from that book.

I hate directly copying the fabric suggestions that come with patterns, so that meant I wasn’t going to sew any striped fabric, sequins or velvet (the three ideas that were offered in the book), so I put it off until I found the right fabric.

The fabric
Browsing the internet a few weeks before
After some more browsing, I came across a beautiful geometrically textured stretch material from The Textile Centre. This was perfect, soft, opaque and something that wouldn’t be restricted to holiday parties.
The Pattern


Next, I needed to trace the pattern from the book and adapt it to my size. Now, the great thing about stretch fabric is very accommodating in terms of fitting. Width-wise nothing needed adjusting. However, I have quite a high waist and longish legs. Then add the fact I hate my knees so wanted the length to fall below them, I needed to lengthen the skirt. There are plenty of instructions on how to this in the book, these even worked with the extra 2 inches of skirt length I added.
Sewing
So I cut out the patterns and started sewing it together. The book has great instructions that are easy to follow. I think the trickiest was sewing the neckline. This piece is 20% shorter and you need to stretch it out evenly against the bodice. But despite thinking I had messed it up, it actually came out perfectly fine.
The Result


I feel very proud of this make, it’s the sort of thing I would have gone out and purchased it if I hadn’t made it myself.
You can see other sewing makes by me here.

IKEA shoe cabinet makeover
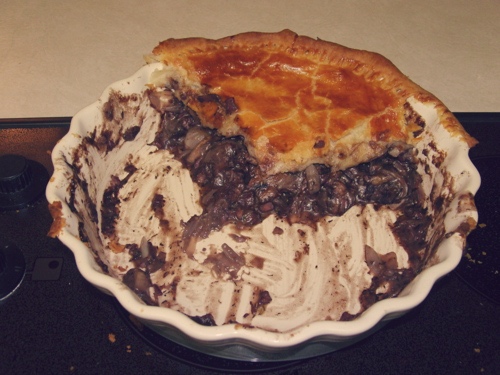
Boeuf Bourguignon Pie
You May Also Like
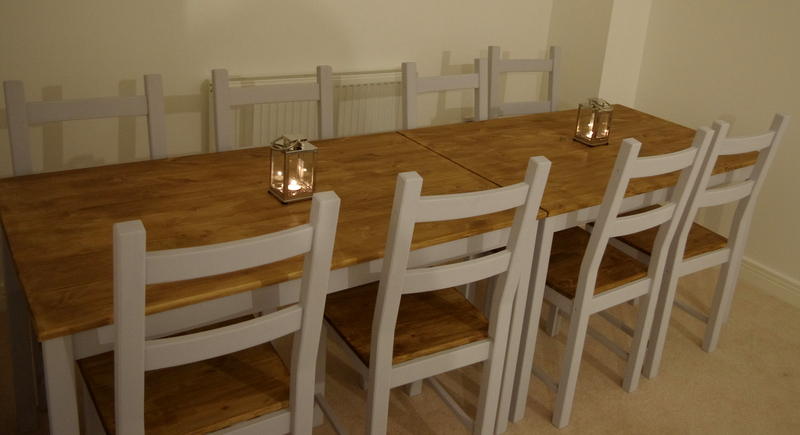
Ikea Hack: DIY Farmhouse table from Ingo + Ivar set
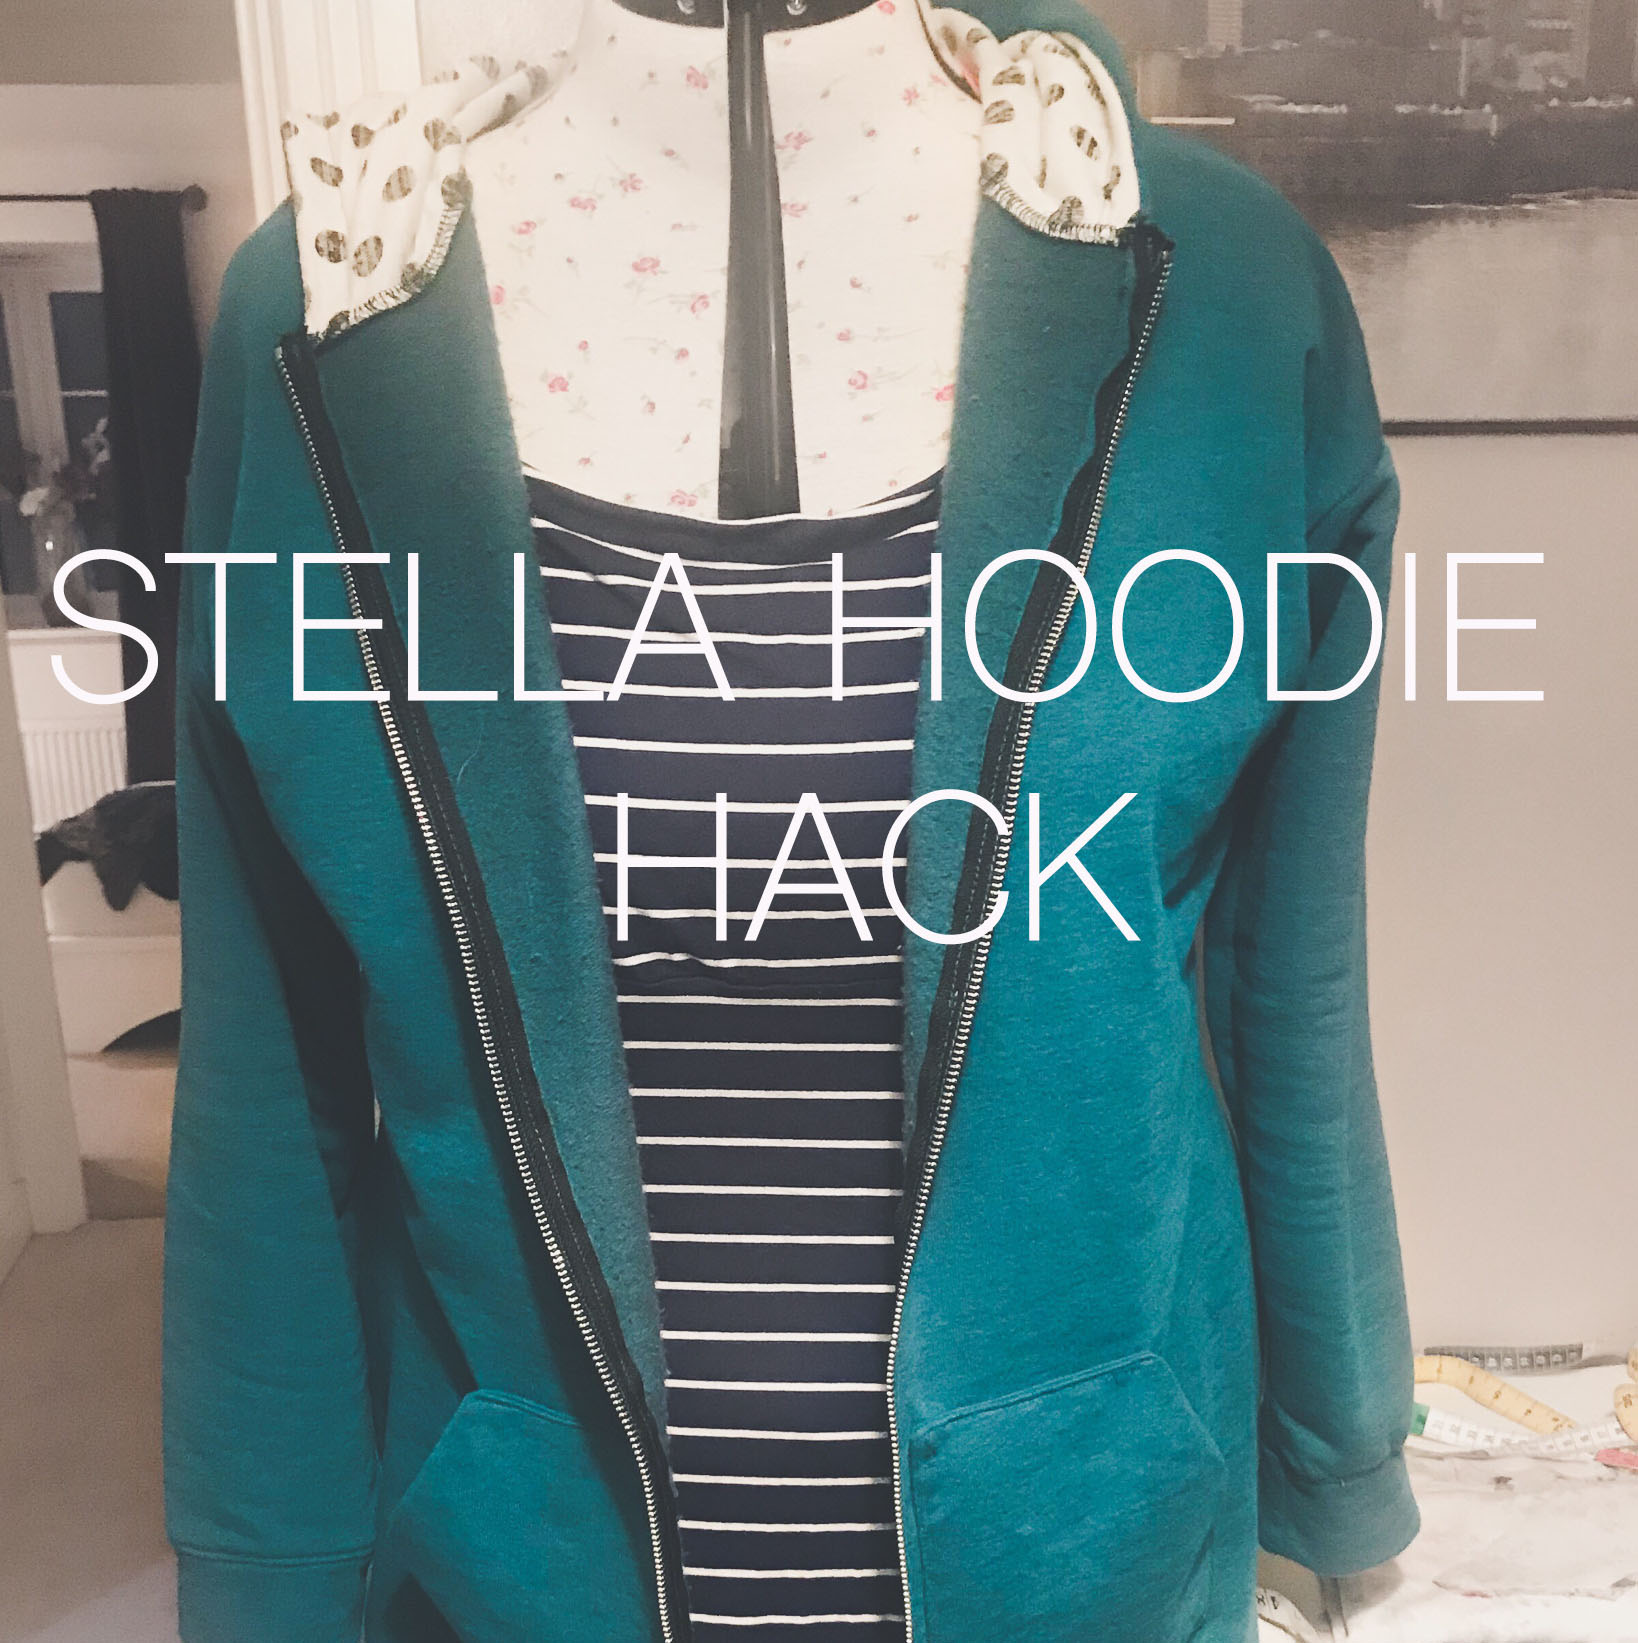
Pattern Hack: Adding a zip and hem cuff to TATB Stella Hoodie
