IKEA shoe cabinet makeover

A few years ago I was given an IKEA Sandnes shoe cabinet. I found the style of it very practical. It hides the shoes but also takes very little space.

I liked it until we had done some work to the entrance hall of
In terms of tools and materials, I used an electric sander (with
I used some ‘chalk white’ Rustoleum chalk paint, some gold spray paint and some handles from eBay.
In terms of how I went about it, I first sanded the cabinet with some
I first used masking tape to cover the ‘main’ area of the cabinet and sprayed the feet with the gold metallic paint. I let that dry long enough that I could mask it when I moved on to painting the rest of the cabinet. For this step, I applied 2 coats of chalk paint. I let it dry overnight.
The next day I found the brushstrokes were too obvious in the paint so I sanded it some more (manually) with some very fine paper to smooth it.
To apply the handles I first measured up to ensure I got the handles centred and lined up. Then, I drilled

Et voila!


You May Also Like

Make Nine 2020
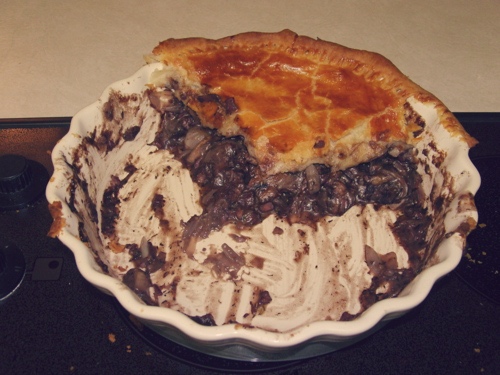
Boeuf Bourguignon Pie